So you figure you don’t have a “Green Thumb”? Then this short tutorial just might be what you are looking for.
Thanks to Minde Wagner for sharing “How to Plant Outdoor Potted Flowers” with our readers.
Time to play in the dirt.
Introduction
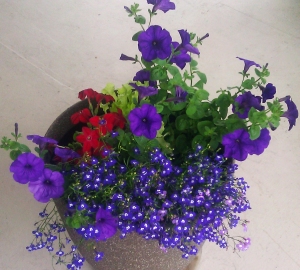
Flowers planted in June
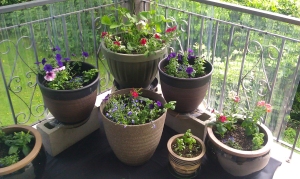
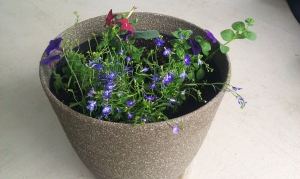 The flowers planted in June – photographed on July 4th.
This article will guide you through the process of creating an outdoor potted flower arrangement. It will instruct on how to plant “partial-sun” flowers in a plastic pot.
This project should be done in spring in order to experience the full blooms in summer. Be prepared to use gentle hands throughout the entire process, and consider the idea that you may get a little dirty.
Before you begin, there are four basic things you need to think about:
1. The location of your flower pot
The location of your flower pot is categorized into 3 different types of sun exposure:
- Full Sun – minimum 6 hours of direct sunlight each day.
- Partial Sun – 3 hours of direct sunlight each day.
- Shade – less than 3 hours of direct sunlight each day.
2. The type of flower pot.
The two main types of flower pots available are:
- Clay (ceramic) pots – for herbs and flowers that like dry soil.
- Plastic pots – for most flowers.
3. The types of flowers you should buy
The types of flowers you buy should match the sun exposure of the flower pot location. You should find similar exposure symbols on each of the plants when you purchase them:
- Full Sun – minimum 6 hours of direct sunlight each day.
- Partial Sun – 3 hours of direct sunlight each day.
- Shade – less than 3 hours of direct sunlight.
4. Your ability to maintain and care for the flowers
You should be prepared to water the flowers each day and remove the dead flowers and leaves regularly. Removing dead flowers promotes new blooms.
List of Materials and Equipment
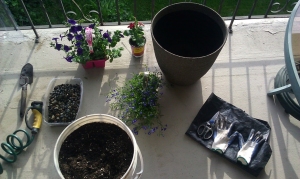
All of the following materials can be found at Home Depot, Canadian Tire, Superstore, or any local garden shop. The flowers and equipment may vary in type and style. Some items are seasonal and only available in spring and early summer. Most items are available all year.
- Small Garden Shovel
- Water Hose with Shower Nozzle (or Watering Can)
- Small-Medium Rocks (approximately 2 liters)
- Flowers.
Minimum requirement for this project:
- 1 x 5” Saratoga
- 3 x 2” Petunias
- 4 x 1” Lobelia
- Potting Soil Mix – minimum 60 liters.
- Scissors
- Garden Gloves
- Sheet of Plastic or Garbage Bag (size: 3ft x 2ft)
- Plastic Pot with drainage holes (size:16”top with 10” bottom).
Materials and Equipment Needed to Plant the Flowers
Steps to Planting Flowers in the Pot
Make sure to follow each of the steps and sub-directions in sequential order. The main steps include: (Step 1) set up materials and equipment, (Step 2) prepare the pot, (Step 3) prepare the flowers, (Step 4) plant the flowers, and (Step 5) water and care for the potted flowers.
Step 1: Set Up Materials and Equipment
- Purchase and have all materials and equipment ready.
- Put on gloves.
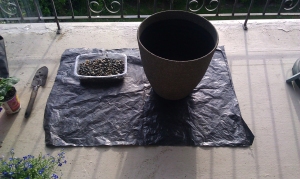
- Place the plastic on the ground to keep the area from getting dirty.
- Place the pot on the plastic to one side.
Plastic and Pot Set Up
Step 2: Prepare the Pot
- Put the rocks in the bottom of the pot
- Fill the pot with potting soil until just over ¾ full.
- Make sure you have enough soil reserved to fill the remainder ¼ of the pot.
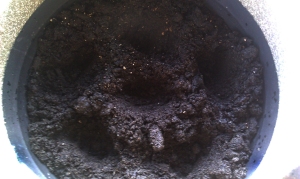
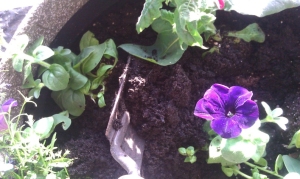
- Dig 6 shallow holes in the soil.
Shallow Holes in the Soil
Step 3: Prepare the Flowers
Be gentle and take your time when handling the flowers. Try not to crush or break stems and leaves. Some breakage may happen by accident; this is usually OK. Most plants will recover from damage if cared for properly.
- Water the flowers using a gentle stream until the soil and roots are moist.
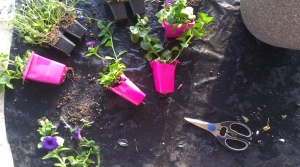
- Cut the plastic flower containers into individual pieces with the scissors.
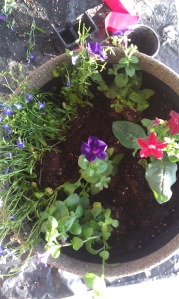
- Arrange the flowers in the pot to visualize how you would like them while they are still in the plastic containers.
Cut the Plastic Flower Containers
Arrange Flowers in the Pot
Step 4: Plant the Flowers
When handling the flowers, grasp gently near the base of the stems where they are strongest. Take your time and be careful with the stems and leaves.
- Hold the first container by the flower base, turn it upside down and look at the bottom.
- Remove any roots sticking out of the bottom container by pulling or cutting them.
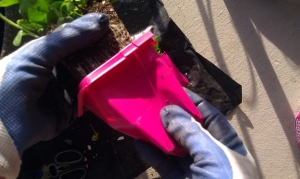
- Hold the flower base with one hand and squeeze the bottom of the plastic container with your other hand.
- Keep squeezing the container and pushing the roots upward until the flowers and roots are out of the container.
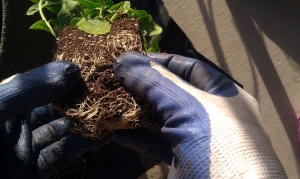
- Gently break up the bottom of the roots so they are hanging loosely. (This will help the flower plant to grow quickly, and to its full potential, in the new soil.)
- Place the flowers and roots in one of the shallow holes in the pot.
***Repeat these steps 1-6 with each flower container you wish to plant***
Squeeze the Container and Push Roots Out
Break up the Bottom Roots
Once you have all the flowers out of the plastic containers, the bottoms of the roots are gently broken up, and each plant is placed in the pot arranged as you like; you may proceed with the following steps.
- Scoop soil using the shovel, from the ¼ reserved potting soil, and put it around the base of the flower plant.
- Repeat step 7 for each flower plant in the pot.
- Fill the area around each flower plant from the remaining ¼ reserved soil until there are no roots showing.
- Gently press the soil around the base of each flower plant with your hands.
Scoop Soil and Fill the Area around Each Plant
Step 5: Water and Care for the Plants
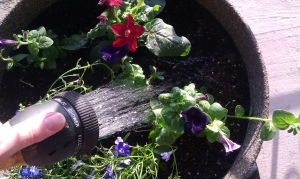
- Water the base of each flower plant in the pot, using a gentle stream of water.
- Wait for the water to soak in, and water again.
- Gently wash any soil off the leaves and flowers.
- Let the water fully drain out of the pot. (This may take 5-10 minutes.)
- Place the pot of planted flowers in the location you chose. (The flowers in this example will require a “Part Shade” location.)
- Water every second day, or keep soil moist.
- Pick off dead flowers and leaves every day, throw them away.
Water the Base of Each Flower Plant
Finished Outdoor Potted Flowers
Once you have completed Steps 1-5, the flower pot should look similar to this.
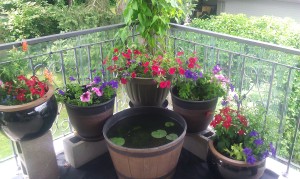
This photo taken July 4th, 2013, about 3 weeks after planting
Flowers are now in full bloom
More Information:
The flowers used in the above instructions can be found on these websites:
The flowers used in the above instructions can be found on these websites:
Here are some websites to help plan and care for your outdoor potted flowers:
Trouble Shooting and Problems
Below are some potential issues that you may encounter during this project and a list of suggested solutions.
Water does not drain from the soil.
- The pot needs to have drainage holes.
- Check to make sure the pot has drainage holes.
- Check to see if the drainage holes are blocked.
The flowers are limp and the leaves are wilted.
- Most flowers need to have moist soil.
- Do not buy wilted, dried-out flowers.
- Do not let the soil dry out.
- Water the flowers before you begin planting.
- Water the flowers after you finished planting.
- Do not let the flowers sit exposed and out of the container without water for more than 1 hour.
- Once you have finished planting the flowers and watering them, and the water has drained out of the pot; wait 24 hours for the flower plants to recover and leaves to strengthen.
There are many broken stems and leaves.
- There may be flowers, stems, or leaves that break off in this process.
- Be careful while handling the flower plants.
- Remove any broken leaves or stems.
- As long as there is a plant fully attached to the roots, the plant should grow and recover with continued care.
The soil dries out quickly.
- Small pots dry out faster than large pots.
- Small pots will need more frequent watering than larger pots.
- Use water gel from your local flower shop to decrease watering times.
Warnings
The finished outdoor potted flowers in this project will be quite heavy and weigh approximately 50-60lbs.
- Bring the materials and equipment near the location you chose for your flower pot.
- Follow these directions near the location you choose for your flower pot.
Some flower plants may be poisonous, and should not be eaten.
- Read the labels before purchasing flowers.
Copy Right
All photos by Minde Wagner.
